

This tutorial offers step-by-step instructions on how to revert to a previous version of Windows in Windows 11. This allows you to roll back to an older version of Windows after an operating system update, system repair, or Windows reset. All of your files will be kept, but apps, drivers, and settings made since upgrading from the previous version may be lost.
This guide includes instructions on how to roll back Windows to a previous version using the Windows Settings app, Windows Recovery Environment, and command line, and also includes instructions for extending the rollback window.
What you need to know before reverting to a previous version of Windows 11
It is generally inadvisable to roll back a Windows update unless it has affected system stability or app compatibility – while changes to Windows functionality from an update can be irksome, it is better to learn to live with them than continue using an unpatched system that may be increasingly vulnerable to cybersecurity threats.
There are a few conditions that must be met so that you can go back to an older version of Windows:
- The files for the previous version of Windows are only kept for 10 days, so rollback must be done within 10 days of the last update occurring
- The C:\Windows.old (where these files are kept) folder must be present and not tampered with
- You cannot revert to a previous version of Windows after a clean install
- Be wary when rolling back as if you have created new user accounts since the update, as they may not be fully restored and require manual fixing
The steps described below can be used to roll back from Windows 11 Feature Updates, or a Windows 10 to Windows 11 upgrade (note, you may need your original Windows 11 installation media on hand for this). Note that Windows 10 is reaching end-of-life, so sticking with Windows 11 is recommended.
You should back up your whole system before rolling back to safeguard your files – while the process is not intended to affect your user files, it’s possible for it to do so if the files are stored in unexpected places. It is also advisable to configure the automatic creation of restore points using system restore for additional protection in case of a problem with an update.
Method 1: Use the Windows Recovery Settings page (GUI)
You must be logged in as an administrator to use the Settings app to go back to a previous version of Windows 11.
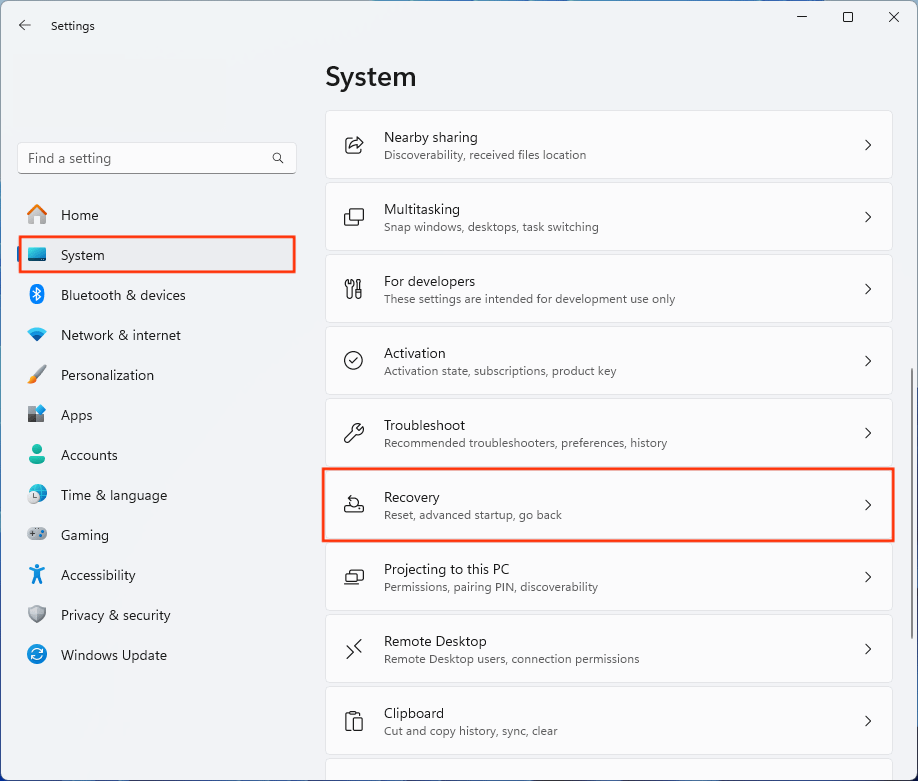
- Right-click on the Start button and select Settings
- Navigate to System > Recovery
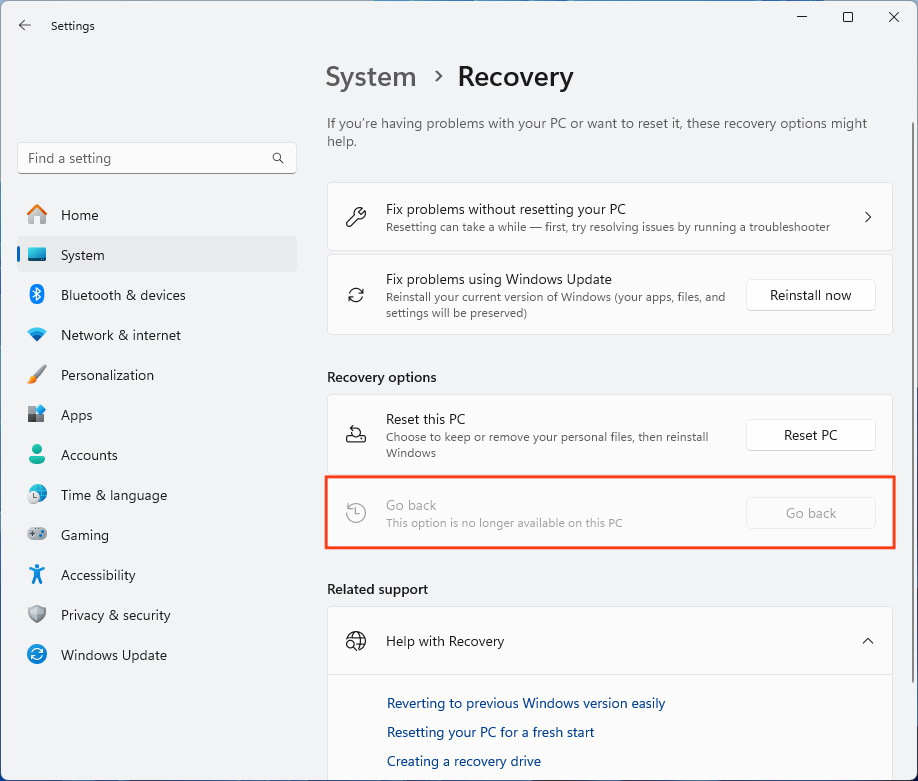
- Under Recovery options, click Go back (this button is only clickable if the above conditions are met)
- Follow the on-screen prompts to provide a reason for the rollback, opt to try to install updates to resolve your issue, confirm the changes that will be made, and begin the process of reverting to a previous version of Windows 11
- Your PC will restart automatically during the process
Method 2: Use Advanced Startup/Windows Recovery Environment (Windows RE)
The Windows Recovery Environment can also be used to roll back a Windows 11 update. If your PC fails to boot several times in a row, it will automatically enter the Windows Recovery Environment.
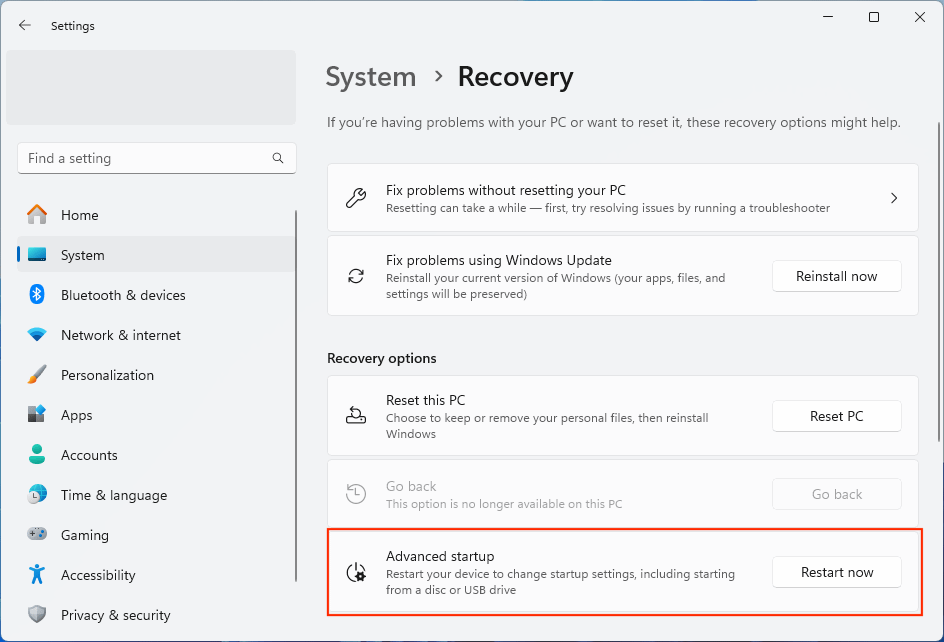
- Open the Settings app and navigate to System > Recovery
- Under Advanced startup, click Restart now to restart in the Windows Recovery Environment
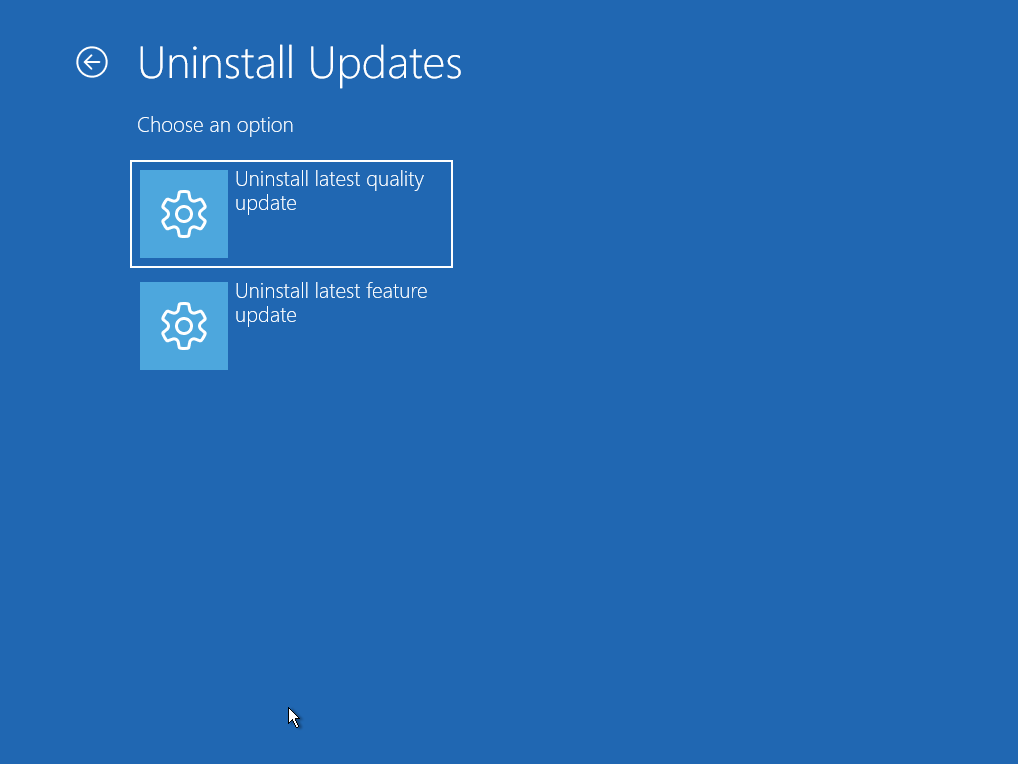
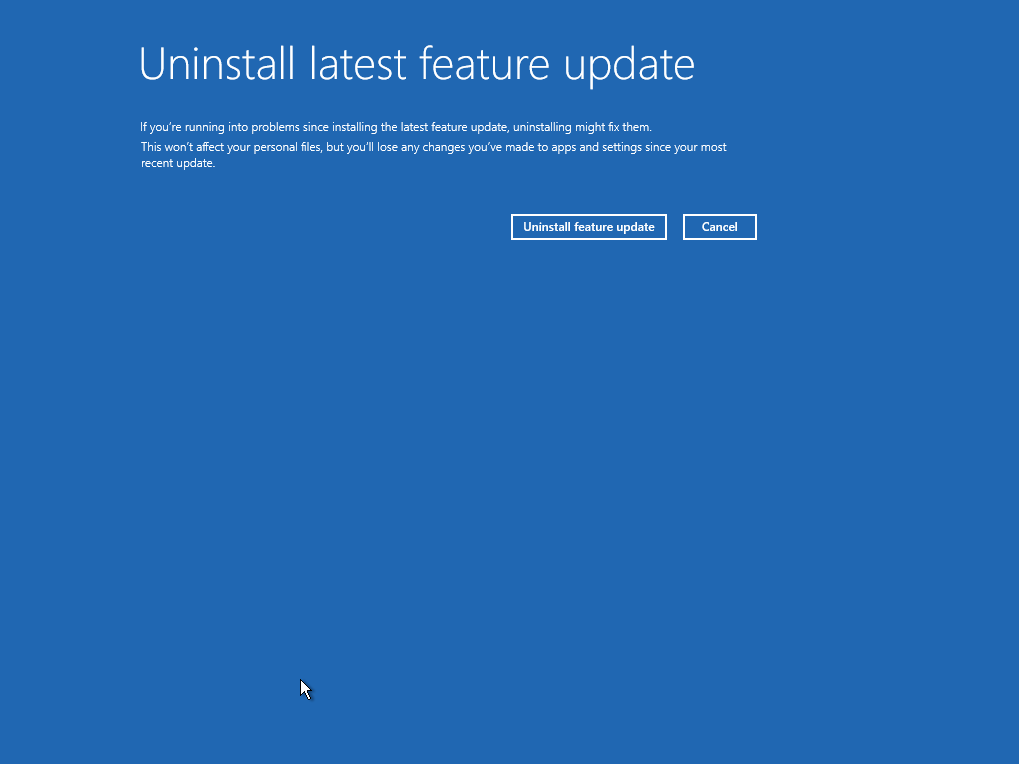
- In the Windows Recovery Environment, go to Troubleshoot > Advanced options > Uninstall Updates
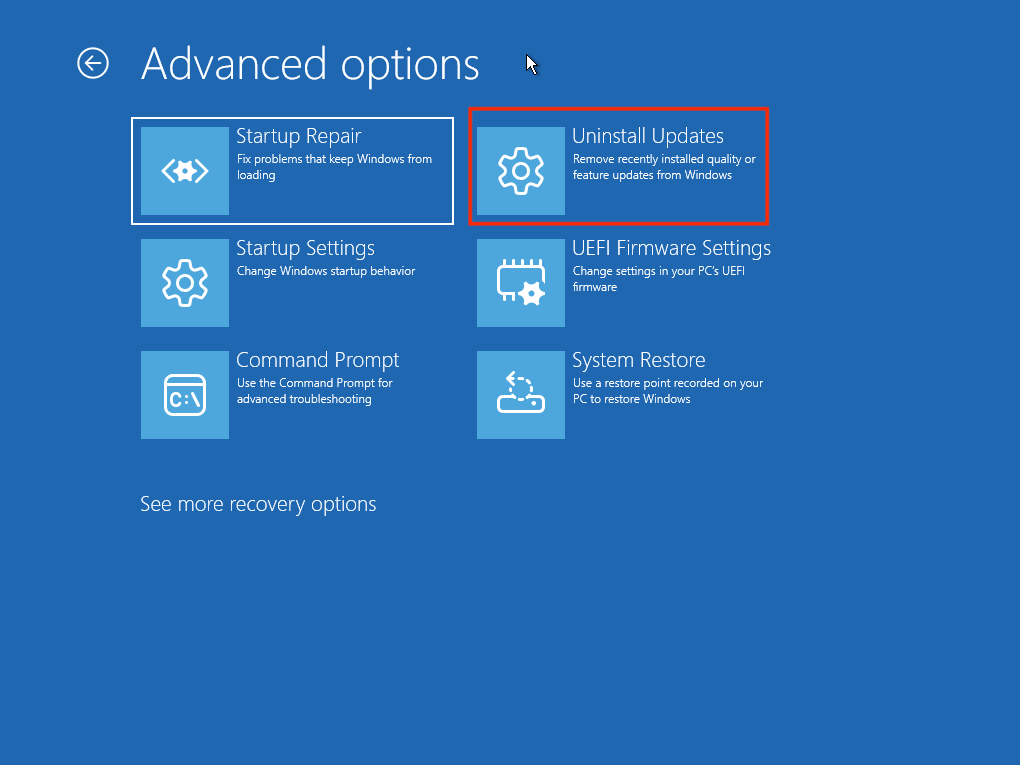
- Choose whether to Uninstall the latest quality update or Uninstall the latest feature update
- Follow the on-screen steps to uninstall the latest update and revert to the previous version of Windows 11
Method 3: Use the command line
Open the command prompt or PowerShell as an administrator and run the following command to revert the last update (be warned, this command will immediately restart your PC and begin the rollback, so make sure you’re backed up and ready):
DISM /Online /Initiate-OSUninstall /Quiet
Command to extend the window for reverting to a previous version of Windows 11
You can run the following command within 10 days of an upgrade to extend the rollback grace period availability to 60 days (the maximum):
DISM /Online /Set-OSUninstallWindow /Value:60
This only applies to the currently installed update.
Manage, test, deploy, and revert Windows Updates and software patches for fleets
NinjaOne Remote Monitoring and Management (RMM) gives you a unified tool for managing Windows, Android, Linux, and Apple devices – including automated testing, deploying, and rolling back of operating system updates.
If an issue is detected, individual devices can be held to or reverted to a previous version of Windows automatically, ensuring your enterprise fleet is always up and running. NinjaOne can also manage patches for third-party software and drivers, and includes remote access, troubleshooting, and support tools for a complete end-to-end support toolchain.


